
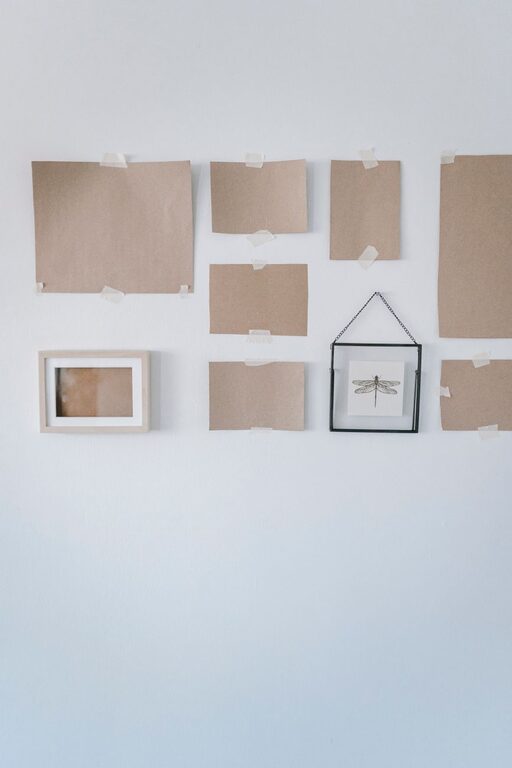
Give Your Walls a Fresh Look
Blank walls can make a room feel unfinished, but decorating them does not have to be expensive or complicated. With a few basic supplies and some creativity, you can make attractive wall decor that reflects your style and works with your existing furniture.
The best DIY projects are simple enough for beginners and flexible enough to fit different rooms. Try one idea for a small update, or combine several projects to create a complete feature wall.
Before you begin, consider the size of your wall, the colors already in the room, and how much time you want to spend on the project. It is also helpful to arrange your materials on the floor first so you can test the layout before attaching anything.
1. Create a Simple Painted Accent
Paint is one of the easiest ways to add interest to a plain wall. You do not need to paint the entire room. A small design can create a strong visual effect with less time and fewer supplies.
Try a painted arch
A painted arch works well behind a desk, bed, entryway table, or reading chair. Choose a color that complements the room, then measure the width and height of the shape. Use painter’s tape for the straight sides and a piece of string with a pencil to help create an even curve.
For a softer look, choose a muted color such as warm beige, soft green, or dusty blue. For more contrast, try a deeper shade that stands out against the main wall color.
Make a geometric design
Use painter’s tape to create triangles, blocks, stripes, or simple overlapping shapes. Keep the colors limited to two or three shades for a balanced result. Press the tape firmly along the edges and remove it while the paint is still slightly damp for cleaner lines.
2. Build a Gallery Wall
A gallery wall is a practical way to display artwork, photographs, postcards, and small decorative objects. It can be carefully planned or arranged in a more relaxed style.
Start by choosing a theme, such as family photos, nature prints, travel memories, or black-and-white artwork. Gather frames in different sizes, but keep one detail consistent. For example, use frames in similar colors or choose artwork with a related color palette.
Easy gallery wall steps
- Measure the wall area you want to use.
- Arrange the frames on the floor.
- Leave a similar amount of space between each piece.
- Take a quick photo of the arrangement.
- Trace paper templates for the frames.
- Attach the templates to the wall before hanging the actual pieces.
This method helps you adjust the layout without creating unnecessary holes. If you prefer a temporary option, use removable hanging strips that are suitable for the weight of your frames.
3. Make Fabric Wall Art
Fabric can add color, texture, and warmth to a room. It is also a useful way to display a favorite pattern without sewing a large project.
To make a simple fabric panel, choose a piece of fabric slightly larger than a wooden canvas frame, foam board, or lightweight art board. Pull the fabric tightly around the edges and secure it on the back with staples or strong craft tape.
You can display one large panel or create a set of smaller panels using coordinating fabrics. This idea works especially well in bedrooms, home offices, and cozy reading areas.
For a more casual display, hang a fabric piece from a wooden dowel. Fold the top edge over the dowel or attach the fabric with clips. Add a cord or ribbon for hanging.
4. Frame Pressed Leaves or Flowers
Pressed plants make simple, natural-looking wall art. You can use leaves, small flowers, or grasses from a craft store or from your own garden. Make sure the materials are dry and free from moisture before framing them.
Place the plant between sheets of paper and press it under a stack of heavy books for several days. Once it is flat, position it on a piece of plain paper and place it inside a glass frame.
Use several matching frames for a clean, coordinated display. Leave plenty of empty space around each plant so the delicate shapes remain easy to see.
5. Design a Paper Wall Display
Paper is inexpensive, lightweight, and available in many colors and patterns. It can be used to make decorative shapes, paper fans, folded flowers, or hanging garlands.
For a modern look, cut circles or arches from several shades of paper and arrange them in a balanced pattern. Attach them to the wall with removable adhesive or place them inside frames.
You can also create a simple three-dimensional display by folding paper into fans and arranging them in a group. Use different sizes, but repeat a few colors throughout the design to keep it organized.
Paper decor is a good choice for children’s rooms, parties, seasonal displays, or rental homes where you want a temporary update.
6. Turn a Basket Into Wall Decor
Woven baskets can add texture while also offering light storage. Choose baskets in different sizes and arrange them together on a wall in an entryway, bedroom, or living area.
You can display empty baskets as decorative pieces, or use them to hold scarves, magazines, lightweight blankets, or small accessories. Before hanging them, check that the wall hardware can support their weight.
For a coordinated arrangement, use baskets with similar natural tones. For a more collected look, combine different patterns and shapes while keeping the overall arrangement balanced.
7. Make a Wall Hanging With Yarn
A yarn wall hanging is an easy project that adds softness and texture. You need yarn, a wooden dowel or sturdy branch, scissors, and a way to hang the finished piece.
Cut several strands of yarn to the same length and attach them to the dowel using simple loops. Trim the bottom into a straight line, angled shape, or gentle curve. Combine different colors and thicknesses for extra texture.
Keep the color palette simple if the wall hanging has a bold shape. Neutral yarns create a calm look, while bright colors can make the piece a cheerful focal point.
8. Use Shelves as Decorative Displays
Small floating shelves can turn an empty wall into a flexible display area. Place framed photos, small plants, books, candles, or handmade objects on the shelves.
Avoid filling every space. A few carefully chosen items usually look more attractive than a crowded arrangement. Vary the height and size of the objects to create visual interest.
If you want to change your decor often, shelves are a practical choice. You can update the display for different seasons or rearrange items when the room needs a fresh look.
Tips for a Polished Result
A few planning steps can make any DIY wall decor project look more finished:
– Choose colors that already appear in the room.
– Mix large and small pieces instead of using items of one size.
– Repeat materials, colors, or shapes to create unity.
– Leave some open wall space so the display can breathe.
– Check measurements before cutting, painting, or drilling.
– Use suitable hardware for the weight of each item.
– Test removable adhesive on a small, hidden area first.
DIY wall decor should make your space feel more personal and welcoming. Start with a project that matches your skill level, use materials you already have when possible, and allow yourself to adjust the design as you go. Even a small painted shape, framed print, or fabric panel can give a plain wall a completely new character.